Why I Put My Smart Devices in a Digital Cage: A Homelab Security Journey
"You will own nothing and be happy." The rat race of competing streaming services leaves you either missing out on your favorite shows or paying multiple subscriptions. The "Stop Killing Games" movement is a perfect example of this growing frustration, a feeling we saw again when Sony announced it would be removing purchased Discovery content from users' PlayStation libraries. Once their license agreement has ended, the content disappears, yet you're still left paying the bill.
Another big issue for me is the intrusion of privacy with some of the modern consumer hardware we use every day. The hardware in our homes is actively working against us. The smart TV in your living room might be spying on you. It's not a conspiracy theory, but a controversial marketing strategy. Using tech like Automatic Content Recognition (ACR), it fingerprints everything you watch and sells that data to advertisers. The FBI has even warned that hackers can take over its camera and microphone.
Feeling like I didn't truly own my data and facing clear security concerns, I had to come up with a solution that could tackle both issues. After watching one too many YouTube videos of other people's slick home lab setups, I dove head-first into the rabbit hole of building a secure home network.
Server Requirements
I didn't waste time immediately shooting for the "perfect" setup. My experience learning to code has made me fearless and curious in the face of the unknown. The fastest way for me to learn new concepts quickly is to get my hands dirty and build something. I wanted to build a server that could work as a NAS: a central place to hoard my favorite movies, shows, photos, music, and any other data that was precious to me. I needed to be able to access this data across trusted devices in my network using SMB and NFS shares. Lastly, I needed some Docker containers to self-host applications that would serve as my alternative to streaming services and the ability to spin up VMs for experimenting without fear of breaking something.
Proof of Concept
I used an old desktop PC I had built years ago and installed Unraid OS on it. I chose Unraid over popular alternatives like TrueNAS mainly due to the Parity setup over a typical RAID setup. Essentially, the largest hard drive is the "parity" drive, which acts as my redundancy. I can mix and match hard drives of different storage sizes to increase my total storage capacity. If one hard drive fails, I can simply replace it, and the parity drive will populate the replacement drive with the data that was originally on the failed one. The catch is that your largest hard drive has to be the parity drive, and one parity drive can only handle one drive failure. If more than one drive fails, data is lost. Unraid currently allows up to two parity drives to be able to handle two drive failures at a time. There are always going to be trade-offs with any setup, and it should be tailored to best suit the requirements of its use case.
It was a glorious mess! A half-broken PC case with a bird's nest of excess power supply wires sticking out. But it worked, and I spent a week messing with the software, getting comfortable with my new environment. It gave me a taste of real ownership, and I was hooked.
Forging the Digital Cage
With a newfound understanding of how to properly set up my server, I still had to figure out how to keep IoT devices in their own bubble, oblivious to any trusted devices connected to my network. That's when I started digging deep into VLANs. My consumer-grade router wasn't cutting it. You could set up a guest network and even an IoT network, but it was still very limiting for my needs. As a security-minded professional, I was at the mercy of the proprietary software the router ran on. It's closed source, so I can't see what's going on, and who knows when the next update will be.
I decided on using OPNsense installed on a low-power mini PC. OPNsense is robust NGFW software that is open-source and gives me ultimate control. You can install OPNsense on any x86 PC that meets the minimum requirements. I went ahead with the purchase of a mini PC mainly because I had run out of hardware to repurpose and wanted to replicate the familiar size and low power draw I was accustomed to. I found this video from the YouTube channel apalrd's adventures to be a good walkthrough for the initial setup of OPNsense.
While you can add a Wi-Fi card to the OPNsense box, it is generally recommended to use a dedicated wireless access point for simplicity and greater wireless coverage. In the spirit of recycling and repurposing old hardware, there is an option in my old router's software to effectively operate as a wireless access point, forgoing any firewall features. Later, when I build my true setup, I'll incorporate a managed network switch to set up VLAN tagging for devices connected via Ethernet.
That messy proof-of-concept sparked the plan for a permanent solution. This post is the story of moving from that pile of salvaged parts to a full-fledged digital fortress.
From MVP to Production (Rebuilding for a More Permanent Solution)
A fortress needs strong walls and a smart gatekeeper. Here are the core components I chose for the build, focusing on their role in the system.
-
Firewall / Router: The Brain
- Model: Topton N100 Fanless Mini PC (4x 2.5GbE Intel i226-V LAN)
- Role: This is the gatekeeper of the entire network, running dedicated firewall software. Unlike a consumer router, this gives me absolute control to build the "digital cages" (VLANs) and enforce strict rules about who talks to whom. It's the difference between a flimsy chain lock and a bank vault door.
-
Network Switch: The Central Nervous System
- Model: KeepLink 9-Port Multi-Gigabit Managed Switch (8x 2.5Gbps PoE+, 1x 10Gb SFP+)
- Role: The key word here is "Managed." This switch is what allows me to create and enforce the VLANs defined in the firewall. The PoE+ ports power devices like my access point without extra adapters, and the 10Gb SFP+ port acts as a high-speed backbone to my server, preventing bottlenecks.
-
DIY 4U Rack Server: The Workhorse
- Specs: AMD Ryzen 5 3600, 32GB RAM, 10TB Storage with a 10TB parity drive, 2TB NVMe cache, Intel Arc A380 GPU, and a Blu-ray drive.
- Role: This is the heart of the lab, handling everything from media storage to running virtual machines for my security experiments. The Blu-ray drive is my commitment to true physical media ownership.
-
Wireless Access Point (WAP): The Recycled Guard
- Model: My old consumer router, now running in AP mode.
- Role: A great way to save money. This repurposed router now serves as the dedicated WAP, broadcasting the various secure and insecure Wi-Fi networks for my different VLANs.
-
Server Rack & Patch Panel: The Skeleton
- Model: VEVOR 12U Open Frame Server Rack & a 24-port patch panel.
- Role: These provide structure, airflow, and professional cable management. The patch panel might seem optional, but it turns a potential rat's nest of cables into a clean, labeled system that makes troubleshooting a thousand times easier.
The Setup: Network Architecture & Key Configurations
This is where the magic happens. The hardware is just a pile of parts until you define the architecture. My setup is built on the security principle of segmentation, using VLANs (Virtual Local Area Networks) to create separate, isolated networks for different types of devices.
Network Diagram
(A diagram showing the different VLANs and how devices connect.)
Firewall Software: OPNsense - The Rulebook for the Fortress
For the brain of my network, a standard consumer router's firmware wasn't going to cut it. I needed granular control. I chose OPNsense, a professional-grade, open-source firewall and routing platform based on FreeBSD. While pfSense is another popular option, I was drawn to OPNsense's modern user interface and its strong focus on security with frequent, consistent updates. It gives me the power to build the "digital cages" exactly how I want, with no compromises.
The core of the setup involves two key steps inside OPNsense:
1. Creating the VLANs:
First, I defined the virtual networks. Under Interfaces > Other Types > VLAN, I created three separate networks, each with a unique numeric tag:
- VLAN 10 - TRUSTED
- VLAN 20 - IOT
- VLAN 30 - LAB
Each VLAN was then assigned to its own logical interface, which lets OPNsense treat it like a separate physical network port. I then enabled a DHCP server for each one to hand out IP addresses to devices.
2. Crafting the Firewall Rules:
This is where I enforce the separation. In OPNsense, firewall rules are processed from top to bottom on each interface, and the first rule that matches a packet wins. My philosophy is simple: Block by default, then explicitly allow only what is necessary.
Here’s a simplified look at the rules for the IoT VLAN (The Cage), which is the most critical:
-
Rule 1: Block Access to Other Local Networks
- Action: Block
- Source: IOT net (This is an alias for all devices on the IoT VLAN)
- Destination: Trusted net and LAB net
- Description: This is the most important rule. It explicitly forbids any device on the IoT network from even trying to communicate with my trusted computers or my lab server. This is the wall of the cage.
-
Rule 2: Allow DNS
- Action: Pass
- Source: IOT net
- Destination: This Firewall (specifically port 53 for DNS)
- Description: This allows the smart devices to look up internet addresses, which they need to function.
-
Rule 3: Allow Internet Access
- Action: Pass
- Source: IOT net
- Destination: any
- Description: This is the final rule that allows the IoT devices to connect to the outside internet for streaming and updates, but only after the first block rule has ensured they can't talk to anything else internally.
This setup ensures that even if a smart TV or other IoT device gets compromised, the attacker is trapped inside the cage and can't move laterally to attack my more important devices.
The Software Stack: Services Inside the Fortress
Hardware is only half the battle. The real power of a home lab comes from the software you run on it. My goal was to replace paid subscription services and take back control of my data, so my software choices reflect that.
The Server OS: Unraid
- What it is: For the server's operating system, I chose Unraid. It's a powerful and flexible OS designed for home servers, making it incredibly easy to manage storage, VMs, and Docker containers through a beginner-friendly web UI.
- Why it matters: This is the foundation of the lab. Its standout feature is the parity-based storage array, which lets me mix and match hard drives of different sizes while still protecting my data against a single drive failure. This flexibility was a huge plus for a home lab build. It also provides a simple, powerful interface for managing my Docker containers and VMs, making it the perfect all-in-one solution.
The Container Engine: Docker
- What it is: Within Unraid's UI, I run Docker. It lets me package applications and their dependencies into lightweight, portable containers. Unraid's "Community Apps" plugin was a game-changer here. It's essentially a curated app store of pre-made templates for popular Docker applications. Since this was my first time working with Docker, the Community Apps feature was invaluable for getting started quickly without having to write complex configuration files from scratch.
- Why it matters: Instead of installing dozens of apps directly on an OS, which can lead to conflicts and clutter, each service runs in its own isolated container. It's cleaner, more secure, and makes updating or removing services trivial.
File Sharing: SMB and NFS
- What it is: Unraid's UI makes setting up file shares incredibly simple. I use both SMB (the native Windows file sharing protocol) and NFS (the native Linux/Unix file sharing protocol) for different purposes.
- Why it matters: This dual-protocol approach provides the best of both worlds. I use SMB shares for easy, drag-and-drop access from my Windows and macOS devices on the Trusted VLAN. This is perfect for general file storage. I use NFS shares for my Linux-based Docker containers and VMs. NFS is generally more performant for Linux-to-Linux communication, making it ideal for high-speed access to media libraries for Jellyfin or configuration data for other services.
Remote Access: SSH
- What it is: For managing my server, which I've named "Exodia," I rely on SSH (Secure Shell). It's the standard for secure command-line access to a server that's running "headless" (without a dedicated monitor or keyboard).
- Why it matters: This is how I perform maintenance, check logs, and run commands on Exodia from my main computer. For security, I've disabled password-based logins entirely, opting for key-based authentication only. My firewall rules ensure that SSH access (on port 22) is only allowed from my TRUSTED VLAN to my LAB VLAN, completely blocking any attempts from the less secure IoT network.
The Core Services:
- Jellyfin (Media Server): This is my self-hosted Netflix. I use the server's Blu-ray drive to rip my physical media, and Jellyfin organizes it into a beautiful library that I can stream to any device on my network—with no monthly fee and no risk of the content disappearing.
- AdGuard Home (Network-Wide Ad Blocker): This is one of the biggest quality-of-life improvements. Instead of a separate device, I run AdGuard Home directly on my OPNsense firewall. It acts as a DNS sinkhole, blocking ads and trackers for every single device on my network at the source. It even stops most ads on my smart TV.
- Vaultwarden (Password Manager): Instead of trusting a third-party company with all my passwords, I run Vaultwarden—a self-hosted server compatible with Bitwarden clients. My passwords stay on my hardware.
- Nextcloud (Personal Cloud): This is my replacement for Google Drive/Dropbox. It's a full-featured file hosting and collaboration platform that gives me total ownership of my personal files.
The Payoff: Challenges & Lessons Learned
No project like this is ever a straight line. The real learning doesn't come from when things work; it comes from when they break. Here are a few key takeaways from the trenches.
-
The Headache: VLAN Tagging is a Three-Body Problem. In theory, VLANs are simple. In practice, getting the firewall (OPNsense), the managed switch (KeepLink), and the wireless access point to all speak the same language of 802.1q VLAN tags was a nightmare. The networking concepts I wrote about in my previous post on the Network+ really hit home here. Forgetting to set a switch port to "tagged" for the correct VLANs meant hours of troubleshooting why a device couldn't get an IP address. Lesson: Master how your specific hardware handles tagged vs. untagged traffic before you start.
-
The Stupid Mistake: I Locked Myself Out. Every network admin has done this at least once. I was creating a new "block" rule and, in my haste, made it too broad. I hit "Apply" and instantly lost access to the OPNsense web interface. My entire network was working, but the gatekeeper had locked me out of its own control room.
Lesson: Always have a "Do Not Lockout" rule at the very top of your firewall rules that guarantees access from a specific trusted IP. And keep a monitor and keyboard handy to plug directly into your firewall box for when you inevitably ignore that first lesson. -
The "Aha!" Moment: The Ping of Success. The first time I connected my smart TV to the "IoT" Wi-Fi, got it working, and then tried to ping my main computer from a device on that network... and saw
Request timed out... that was everything. It wasn't a theoretical diagram anymore. It was a working cage. I had tangible proof that my rules were working and my trusted devices were protected.
Reading about network theory is one thing. Nothing teaches you faster than breaking your own network at 11 PM on a Tuesday and having no one to blame but yourself.
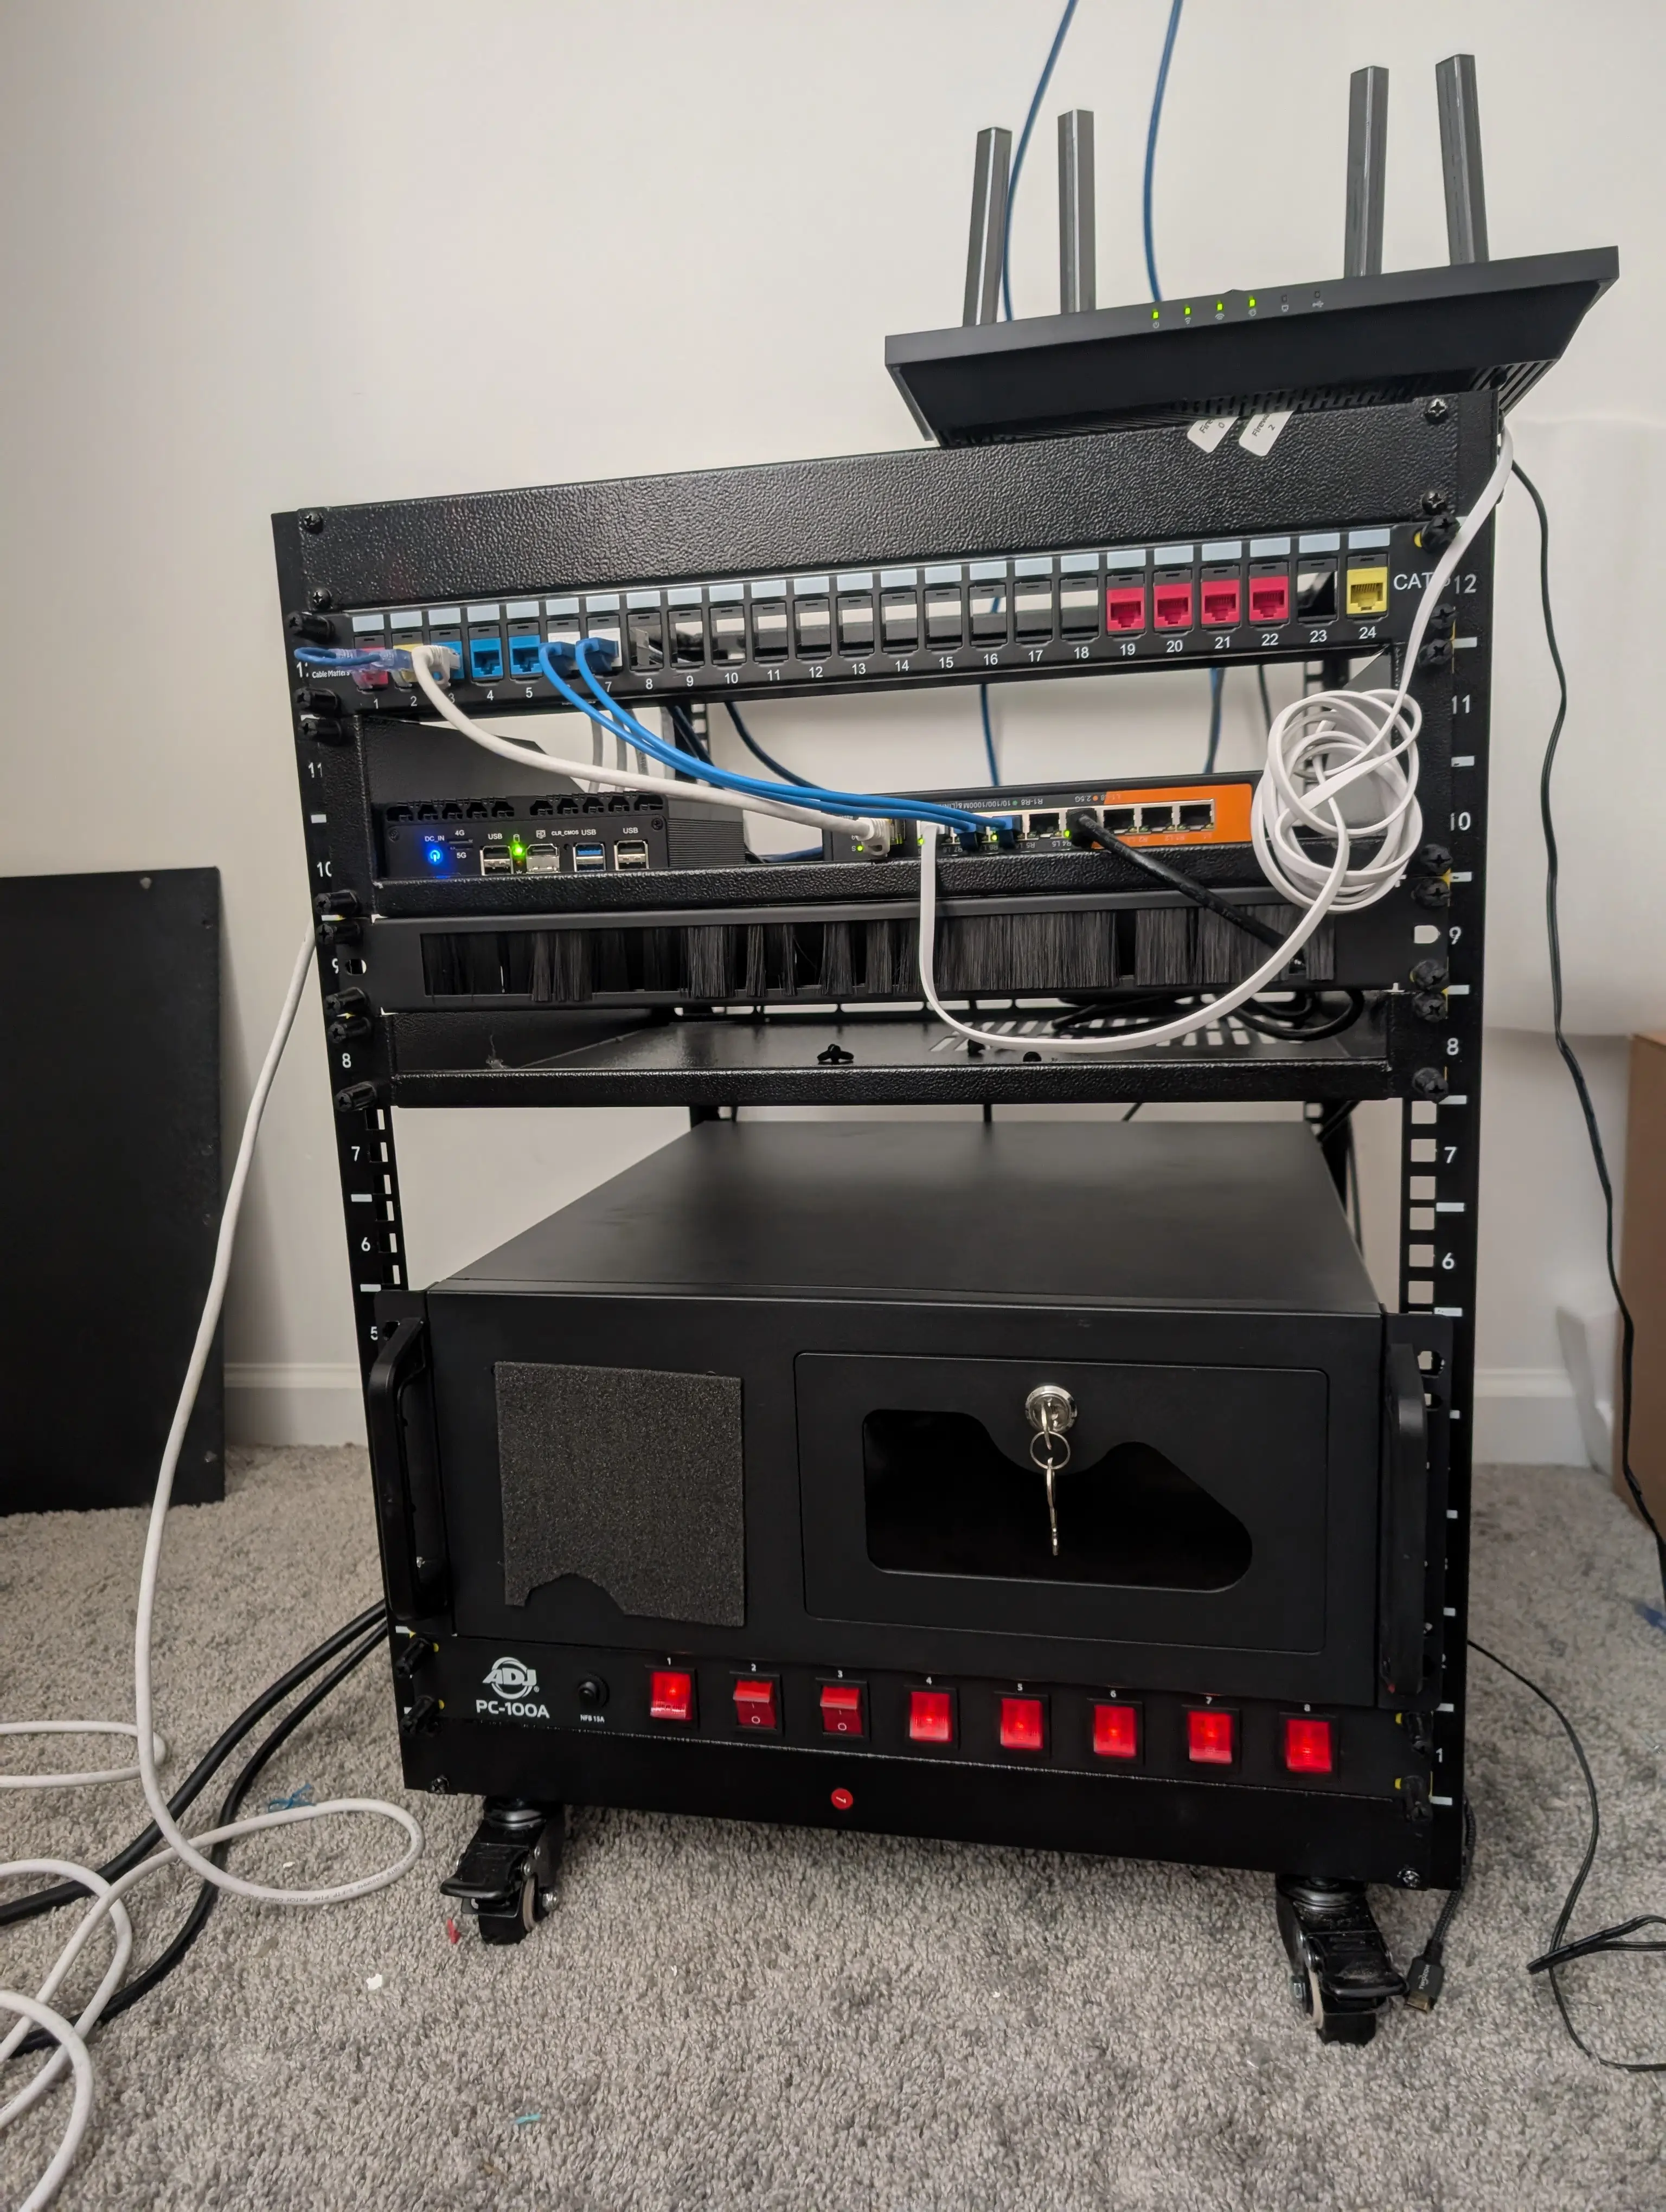
Network Visualization
Here's a look at the evolution of my network setup and the physical hardware that makes it all possible:
Current Network Architecture
Visual representation of my current network segmentation and traffic flow
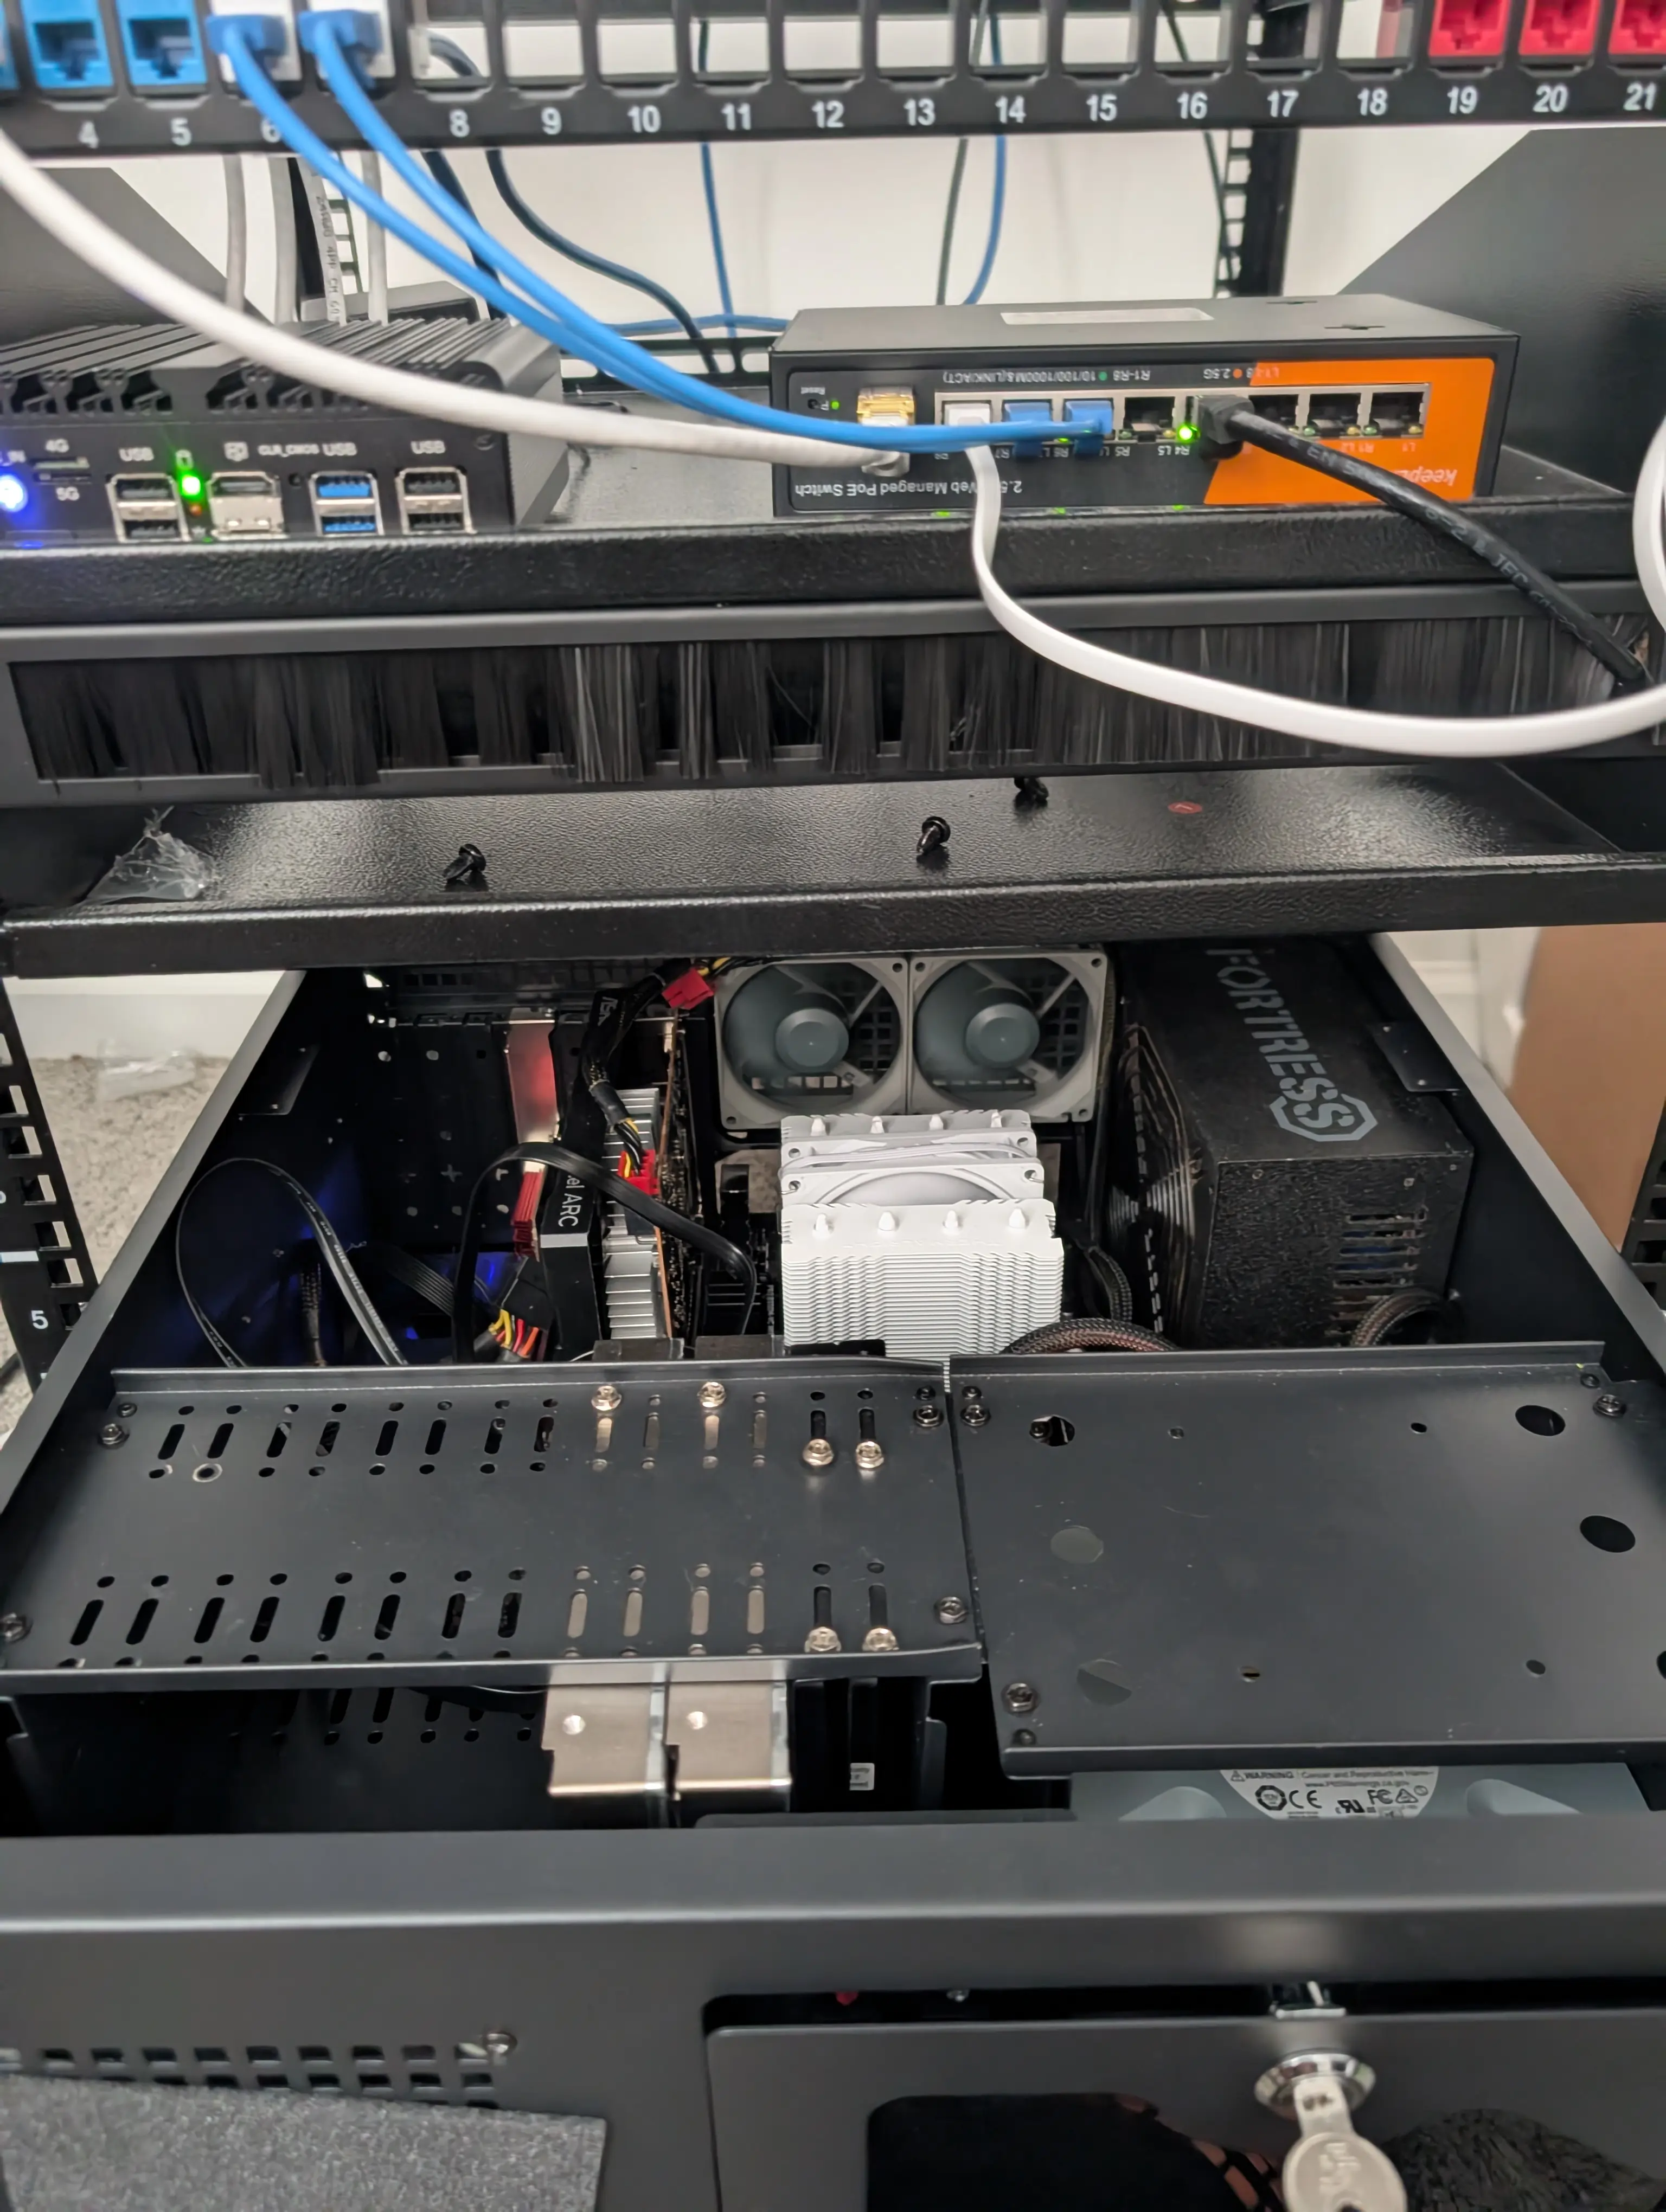
Server Hardware
The physical server hardware that powers my self-hosted services
Internal Components
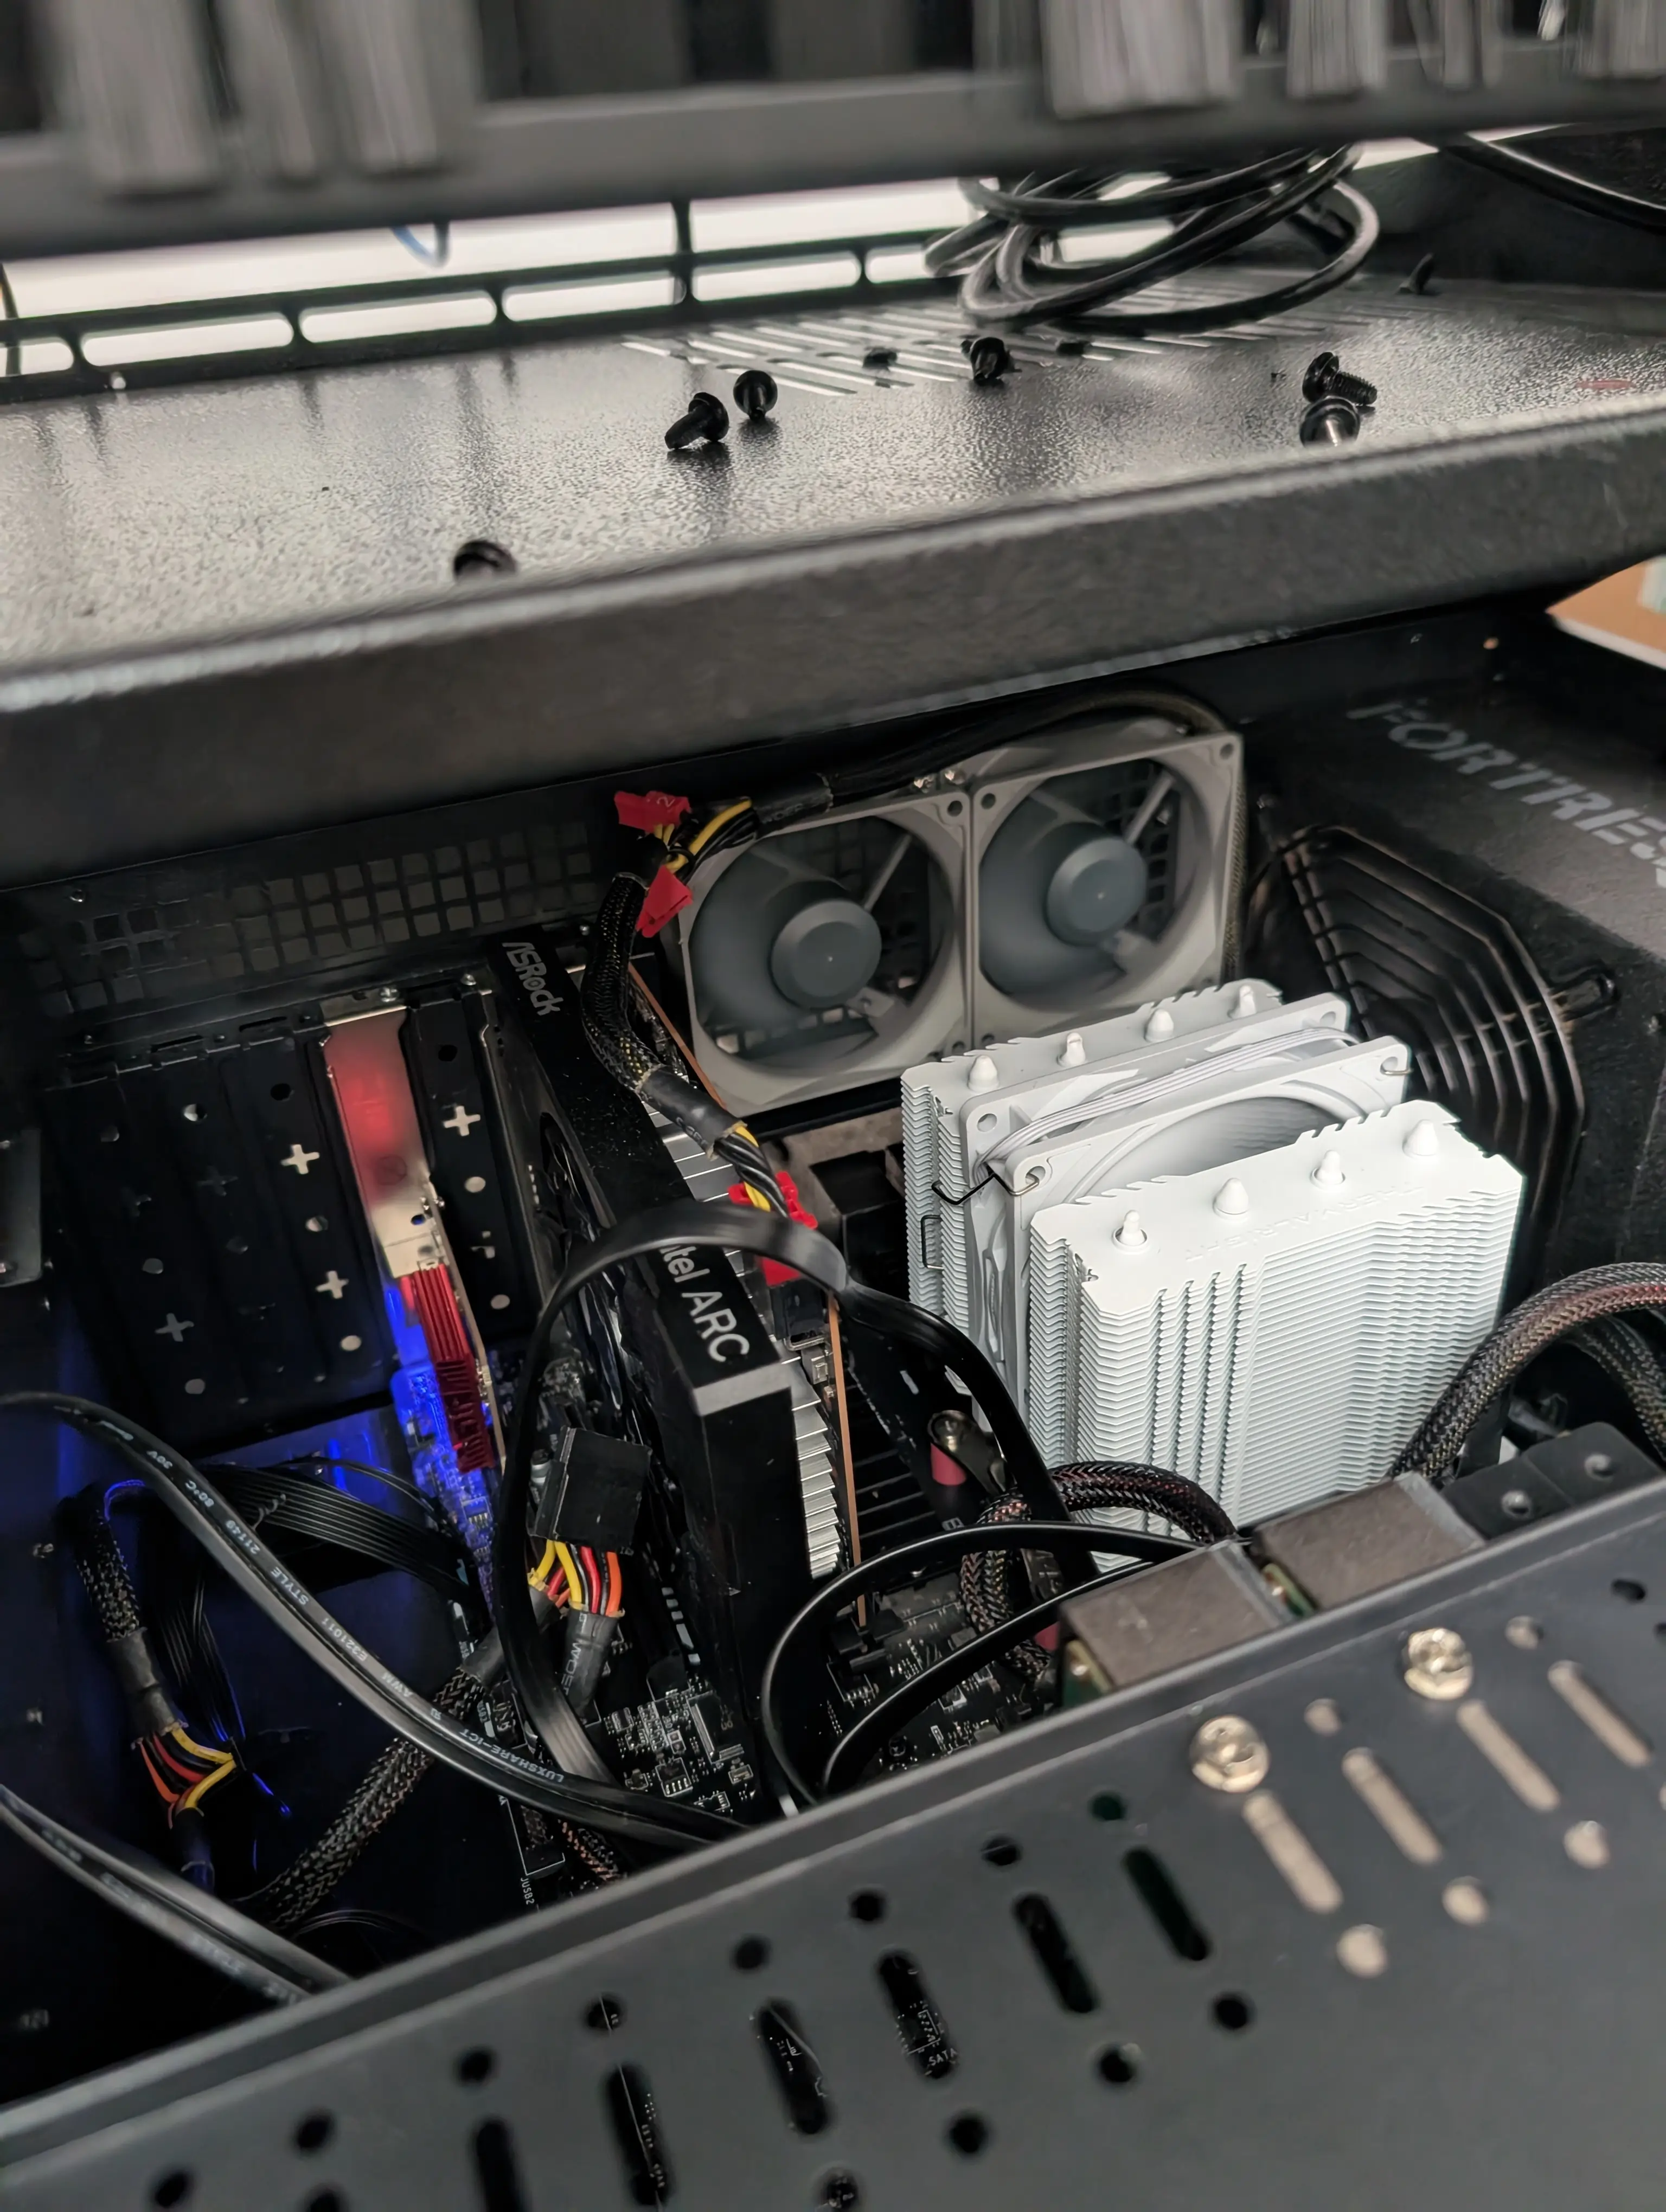
Inside the server: hard drives, cooling, and cabling that make it all work
Take Back Your Network
This project was about more than just building a server; it was about taking back control. By building this digital fortress, I've not only shielded my personal data from prying eyes but also created an invaluable sandbox. This lab is where I test security tools, break applications, and practice incident response—skills that are critical in the AppSec field and that you can't learn from a textbook.
You don't need a 12U rack to get started. The most powerful tool I used was a repurposed desktop PC from years ago. Start there. Grab an old laptop or a Raspberry Pi, install OPNsense or AdGuard Home, and start segmenting your network. The hands-on experience you'll gain from defending your own network is the most effective way to build real-world security skills.